I recently had the delightful task of creating a Bridgerton-themed backdrop for my friend’s bridal shower in New York, and I can’t wait to share how I did it.
If you love the elegance and charm of the Regency era as much as we do, this guide is for you.
A little backstory first: My friend Emily is a massive fan of Bridgerton. When she got engaged, she dreamt of having a bridal shower that captured the romance and elegance of the show.
Being her maid of honor, I took it upon myself to bring her dream to life. The venue was a cozy rooftop in Brooklyn, with a stunning view of the Manhattan skyline – the perfect canvas for our Bridgerton-themed decor.
Materials You’ll Need
Before we get started, gather these materials:
- Fabric (pastel shades): Think soft pinks, blues, and creams.
- Gold frame or wooden dowels: To create the structure.
- Floral garlands: Roses, wisteria, and peonies are perfect.
- Fairy lights: For that extra magical touch.
- Ribbon and lace: To add texture and detail.
- Hot glue gun and glue sticks: For assembling.
- Scissors and measuring tape: For precision.
Step-by-Step Guide
Step 1: Choose Your Fabric
I started by selecting fabrics in pastel shades. I opted for a mix of light blue, pink, and cream chiffon, which draped beautifully. The fabric sets the tone, so choose colors that scream Regency-era elegance.
Step 2: Create the Frame
For the frame, I used lightweight wooden dowels. If you prefer something more ornate, a gold-painted frame can look stunning. Assemble the frame to your desired size – ours was about 8 feet tall and 6 feet wide to fit the rooftop space.
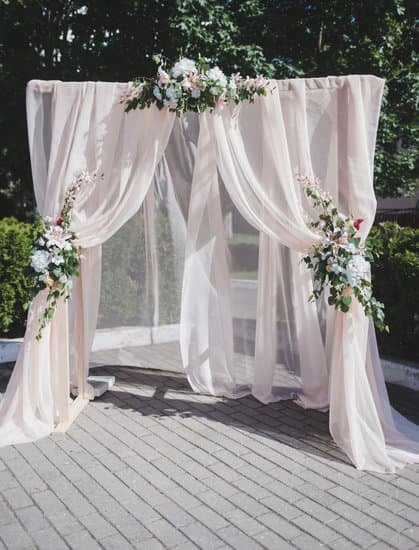
Step 3: Drape the Fabric
Once the frame was up, I draped the fabric over it, securing it with a hot glue gun. I layered the colors, allowing them to flow naturally. Don’t worry about perfection here; the goal is to create a soft, flowing effect.
Step 4: Add the Florals
Next, I added floral garlands. I intertwined roses, wisteria, and peonies along the top of the frame and let them cascade down the sides. You can use floral wire or a hot glue gun to keep them in place. The flowers brought the backdrop to life, making it feel like a scene straight out of the Bridgerton Gardens.
Step 5: Incorporate Fairy Lights| Optional
Fairy lights are a must for adding a magical touch. I did not use them.
Step 6: Final Touches
To complete the look, I added ribbons and lace. I tied them to the frame and let them flutter in the breeze. These small details made the backdrop even more romantic and picturesque.
Tips for Success
- Test the stability: Ensure your frame is sturdy, especially if you’re hosting outdoors. Wind can be a party pooper!
- Use a mix of real and faux flowers: Real flowers add fragrance and freshness, while faux ones ensure your decor stays perfect throughout the event.
- Lighting is key: If you’re hosting in the evening, good lighting can transform your backdrop from pretty to magical.
Final Thoughts
Creating this Bridgerton-themed backdrop was a labor of love, and seeing Emily’s face light up was worth every minute spent.
It was the perfect setting for her special day, filled with laughter, love, and a touch of Regency-era charm.
So, if you’re planning a Bridgerton-themed event, give this DIY backdrop a try. It’s a beautiful way to bring a bit of that romantic, opulent world to life. And remember, the most important ingredient is the love and effort you put into making it special.
Happy decorating!